Web-based groupware with PhpGroupware
Introduction
As of June 2001, this is the nicest open-source groupware product that I have seen, and it seems to be the project that has the most momentum. As of October 2001, unfortunately, it doesn't offer a dedicated WYSIWYG client, support for disconnected mode, or synchronization with PDAs.
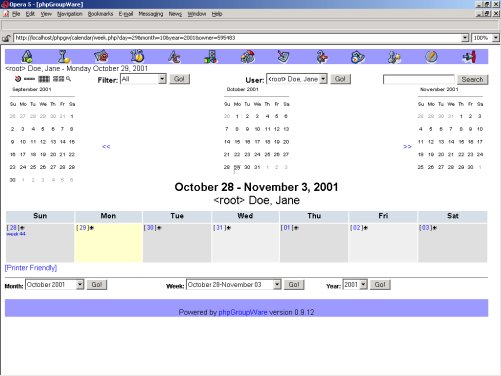
Here's what the Calendar module looks like:
Setup
Linux
- Install a DBMS server, either MySQL or PostgreSQL
- Install an IMAP server, either University of Washington IMAP or Courier IMAP (CHECK: Is UoW OK? If yes, 4.x or 2K? Documentation sez Courier-IMAP 0.33+ and/or qmail 1.03 for POP3 access. Config.php lists Cyrus or Courier, UWash, Uwash-Maildir.)
- Install Apache.
Install PHP as a dynamic Apache module (DSO) with support for MySQL/PostgreSQL and IMAP.
It is recommended to install PHP as an Apache module (mod_php.rpm) instead
of a stand-alone binary (php.rpm).
In case Apache is already installed, check whether it supports dynamic modules by running httpd -l (it should say mod_so.c).
If yes, check whether the mod_php module supports any DMBS eg. MySQL: To do this, create a basic index.php in the Apache root document directory with the following code:
<HTML>
<?php phpinfo();>
</HTML>Aim your browser at this page, and check the compilation switches (eg. --with-mysql). Red Hat 7.1 comes with Apache 1.3.19-5 with DSO compiled, but the PHP package does not support MySQL (phpinfo() says --without-mysql). See section below on how to compile Apache, and add PHP either as a static module or a DSO module.
- Install PhpGroupware in Apache's document root directory: cp phpgroupware.tar.gz
/usr/local/apache/htdocs/ ; cd /usr/local/apache/htdocs/ ; tar xzvf phpgroupware.tar.gz
Note: It appears that the phpGroupWare_plus-0.9.9.tar.gz tarball includes the basic PHPGroupWare application with extra modules thrown in, ie. you should only need this package for a complete PHPGW installation instead of installing the basic tarball and the plus tarball. The plus package, however, is older than the basic package, and since I had problems install the basic .0.9.9 package, I recommend that you stick to the basic package until things are sorted out.
- Change ownership for the ./htdocs/phpgroupware directory so the web
server can write the all-important header.inc.php file : chown -R nobody:nobody
./htdocs/phpgroupware
Note: The Apache RPM package that comes with RH 7.1 uses apache.apache to run.
- Change the user mode set for ./phpgroupware/files : chmod 700 ./files
- Launch MySQL, create the phpgroupware database and grant access to user "phpgroupware":
- mysqladmin -uroot -p create phpgroupware
- mysql -uroot -p
- grant all on phpgroupware.* to phpgroupware@localhost identified by "test";
- Log out from MySQL
- Aim at http://myserver/phpgroupware/setup/ : Fill in "Admin password
to header manager", "Password of DB User" (here, "test"),
"Password needed for configuration"
. Click on Write Config.
Note: If you screw up and want to start again from scratch, just remove phpgroupware/header.inc.php and the DB and tables in the DBMS
- Once the header.inc.php has been successfully created, you are presented with a login screen for "Setup/Config Admin Login" and "Header Admin Login". Logging on with the latter brings you back to changing header.inc.php. Log on with Setup/Config Admin to create tables in the phpgroupware database
- In Section "Step 1 - database management", create the required tables in database phpgroupware by clicking on Create, followed by Re-check my installation
- In section "Step 2 - Configuration", click on Edit Current Configuration (or Configure Now). Set the location for temporary files (eg. /tmp), the files/ sub-directory (/usr/local/apache/htdocs/phpgroupware/files), and the PHPGW's URL (from http://www.domain.com/phpgroupware to eg. http://localhost/phpgroupware). Click on Submit
- Still in "Step 2", click on "Click Here to setup 1 admin account and 3 demo accounts." Note: a demo account is already available, so you don't have to do this now (if created, the 3 demo accounts are demo/guest, demo2/guest, and demo3/guest)
- Log out by clicking on the Logout link in the upper right-hand corner.
- Connect to the PHPGW server as a regular user with eg. http://localhost/phpgroupware/ . Your are now in the welcome page. Log in with the test account demo/1234
- Create a new user with administrative privileges, and delete the demo account
Windows
Setup
For this installation, I used the free PHP-capable OmniHTTPd 2.08 server, and the Windows version of MySQL 3.23.43.
- Install OmniHTTPd, and check that the http service is running by opening a DOS box and running "netstat -a" (If not, in W2K: Control Panel | Administrative Tools | Services | OmniHTTPd Professional : Start)
- Install MySQL for Windows
- Open a DOS box, change to where the MySQL binaries live (eg. D:\mysql\bin\), and create a database by running "mysqladmin -uroot -p phpgroupware"
- Connect to the MySQL server process to grant access rights to this new database: "mysql -uroot -p", followed by "grant all on phpgroupware.* to phpgroupware@localhost identified by "test";". Log out.
- Go to the directory where HTML documents live (eg. D:\Program Files\omnihttpd\HtDocs\), and untar the PhpGroupware package there
- Change to the PhpGroupware sub-directory, and create a files/ sub-directory (D:\Program Files\omnihttpd\HtDocs\phpgroupware\files)
- Create PhpGroupware's configuration file: Aim your browser at http://localhost/phpgroupware/setup/
- Fill in the following sections:
- Server Root = D:\Program Files\omnihttpd\HtDocs\phpgroupware
- Include Root = D:\Program Files\omnihttpd\HtDocs\phpgroupware
- Admin password to header manager = test
- DB Password = test
- Configuration Password = test
- Click on Write Config
- PhpGroupware created its header.inc.php configuration file. Click on Continue.
- Type the password for the Setup/Config Admin Login account (test, here)
- In "Step 1 - database management", click on "Create the tables"
- In the next screen, click on "Re-check My Installation"
- Back in the main screen, in "Step 2 - Configuration", click on Edit Current Configuration (or Configure Now)
- In this new screen, you just need to fill in the three settings in the "Path information section" (no trailing slashes!):
- Full path for temporary files = D:\TEMP
- Full path for users and group files = D:\Program Files\omnihttpd\HtDocs\phpgroupware\files
- Scroll down to the end of this page, and click on Submit
- If PhpGroupware logged you out, go back to "Step 2 - Configuration" by aiming at http://localhost/phpgroupware/setup
- In Step 2, click on "Click Here to setup 1 admin account and 3 demo accounts."
- Fill in the "Details for Admin account" section, eg. root/Jane/Doe/test. Click on Submit
- Click on Logout in the upper right-hand corner
- Aim at http://localhost/phpgroupware, and log on with the administrator account that you just created, eg. root/test
Issues
- The File Manager module doesn't work because it seems to make a Unix-specific call: Warning: MkDir failed (No such file or directory) in D:\Program Files\omnihttpd\HtDocs\phpgroupware\phpgwapi/inc/class.vfs.inc.php on line 409. To correct this error you will need to properly set the permissions to the files/users directory. On *nix systems please type: chmod 770 D:\Documents\FTP\phpgw\files/users/ . Even creating a users/ sub-directory doesn't work.
Installing additional applications
From the PHPGW documentation:
Once you have the core phpGroupWare install up and running, you may want to download and install additional applications. You should consult any README or INSTALL files that come with the new application first, as most require you to create additional tables in the database, and add additional translation data to the lang table (typically a file called lang.sql)
You install the new application within the phpGroupWare install tree by copying the application directory into the phpGroupWare install location, and enabling the application through the Administration page.
For example, this is the process to install the Headlines application: (see [http://www.sourceforge.net/projects/phpgwapps] for more applications)
Download the .tar.gz file for the application, or check out the source with
cvs with
export CVSROOT=':pserver:anonymous@cvs.phpgroupware.sourceforge.net:/cvsroot/phpgwapps'
cvs
login (just hit enter if prompted for a password)
cvs co headlines
Move the headlines directory into your phpGroupWare install directory.
Log into phpGroupWare as an administrative user, and go to the Administration page.
In the first section, choose the Applications link.
Click on add, and fill in the form.
Application name should be identical to the name of the directory you moved into the phpGroupWare install, in this case use headlines
Application Title is shown in the navigation bar and other places to refer to the new application. Enter Headlines for this example.
Enabled can be used to disable an application for all users temporially. You should normal check the box to enable the application.
Back in the Administration page, you need to enable the application for specific users or user groups by editing them, and checking the new Headlines box that appears in the middle of the account editing page.
Once you have added the Headlines app to your account, you should see a Headlines entry in the Administration and Preferences pages, and there should be an icon for the Headlines application in the navigation bar.
Once you enable a few of the Headlines sites through the Administration page link, you should see headlines grabbed from the sites you selected when you click on the Headlines icon in the navigation bar.
Compiling Apache, PHP, and WebDAV
If the RPM package provides no support for the DBMS you intend to use, you'll have to compile PHP and Apache yourself. To keep your computer tidy, you should remove the Apache and Apache-related RPMs installed with RedHat 7.1 using rpm -e mod_dav mod_perl mod_ssl apacheconf apache ; rm -Rf /etc/httpd/ /var/www.PHP and WebDAV as static Apache modules
- cd /usr/src
- tar xzvf apache_1.3.x.tar.gz
- tar xzvf mod_dav.tar.gz
- tar xzvf php-x.x.x.tar.gz
- cd apache_1.3.x
- ./configure --prefix=/usr/local/apache
- cd ../mod_dav ; ./configure --with-apache=../apache_1.3.x ; make ; make install
- cd ../php-x.x.x
- ./configure --with-mysql=/usr/local/mysql --with-apache=../apache_1.3.x --enable-track-vars
- make ; make install
- cd ../apache_1.3.x
- ./configure --prefix=/usr/local/apache --activate-module=src/modules/php4/libphp4.a --activate-module=src/modules/dav/libdav.a
- make ; make install
- Edit Apache's httpd.conf configuration file, and add or uncomment Addtype application/x-httpd-php .php. Also edit The IfModule mod_dir.c section to add index.php
- Start Apache with /usr/local/apache/bin/apachectl start
PHP and WebDAV as dynamic Apache modules
To compile DSO modules, use the apxs binary that comes with Apache. The RPM package that comes with RedHat 7.1 does not provide this utility.
- cd /usr/src/apache ; ./configure --prefix=/usr/local/apache --enable-module=most --enable-shared=max ; make ; make install
- cd /usr/src ; tar xzvf mod_dav.tar.gz ; cd mod_dav ; ./configure --with-apxs=/usr/local/apache/bin/apxs ; make ; make install
- cd /usr/src ; tar xzvf php-x.x.x.tar.gz ; cd php
- (CHECK: Needed even by PHP4?) cd php/php4
- (CHECK: Needed even by PHP4?)rm -f config.status config.cache
- (CHECK: Needed even by PHP4?)make clean
- ./configure --prefix=/usr/local/php --with-apxs=/usr/local/apache/bin/apxs --with-imap --enable-track-vars --with-mysql=/usr (EITHER DOESN'T COMPILE OR APACHE FAILS LOADING MODULE --with-mod-dav=/usr/local/apache/libexec, or is it due to IMAP?)
- make ; make install
- /usr/local/apache/bin/apachectl start
Note: In order for Apache to let PHP handle any index.php file, check whether httpd.conf contains the following:
<IfModule mod_dir.c>
    DirectoryIndex index.html index.php
</IfModule>
Also, make sure the AddModule (regardless of whether PHP was compiled as a static or dynamic module) and LoadModule (only for DSO) are available in httpd.conf.
Finally, make sure the following is uncommented:
AddType application/x-httpd-php .php
AddType application/x-httpd-php-source .phps
TO DO
When testing the File Manager module with PHPGW Plus, clicking on any button says "The requested URL /phpgroupware/phpgroupware/filemanager/index.php was not found on this server." -> config error? Same error with PHPGW basic.
PHPGW basic or plus: Sometimes, the icon bar has icons missing when navigating between modules. Hitting Home does not solve the issue (eg. click on ToDo -> The File Manager icon is gone!)
Trouble Ticket System -> Database error: Invalid SQL: select t_id,t_category,t_priority,t_assignedto,t_timestamp_opened,t_user,t_timestamp_closed,t_subject from ticket where t_timestamp_closed='0' order by t_priority desc Session halted.
Log on as demo/1234, click on Admin -> admin window!
Access not permitted even when logged on as admin/test!
CHECK Note: You must use the same username and password in phpGroupWare that you use to log into your mail server. If you change your password and it still isn't working, try logging out of phpGroupWare (the rightmost icon in the navigation bar) and then log back in. A preference page to edit the email settings is being developed, and should appear shortly after the first beta release.
What about WebDAV? Does PHPGW require it? If yes, does it need to be installed in Apache or PHP? Is installing a DSO-capable Apache RPM and mod_dav RPM enough for PHPGW to work? rpm -ql mod_dav -> /usr/lib/apache/libdav.so
PHP --with-mod-dav=DIR Include DAV support
through Apache's mod_dav,DIR is mod_dav's installation directory (Apachemodule
version only!)
PHP --with-mysql[=DIR] Include
MySQL support. DIR is the MySQL base directory. If unspecified, the bundled
MySQL library will be used.
APACHE --add-module=FILE on-the-fly copy
& activate a 3rd-party Module
APACHE --activate-module=FILE on-the-fly
activate existing 3rd-party Module
APACHE --enable-module=NAME enable
a particular Module named 'NAME'
APACHE --disable-module=NAME
disable a particular Module named 'NAME'
----
Neither PHP 4.0.4pl1 nor 4.0.2 could run (4.0.4) or compile (4.0.2) with WebDAV.
4.0.2: In file included from internal_functions.c:42: /home/ffaure/phpgw/php-4.0.2/ext/dav/php_dav.h:35: parse error before `*'
PHP: After removing --with-mod-dav, Apache still can't load PHP's DSO module. Recompile PHP with only axps and mysql-> OK -> imap or mod_dav?
Resources
- http://www.phpgroupware.org
- IRC channel : irc.openprojects.net, #phpGroupWare
- Apache: http://www.apache.org
- MySQL: http://www.mysql.com
- PHP: http://www.php.net
- Marcel's Linux Explorations: Introducing phpGroupWare
Q&A
How to create header.inc.php independently?
The documentation warns against giving user nobody (which Apache users to run) write access to phpgroupware/ sub-dir, and recommends using the "setup program" to achieve this, but no explanation on how to do this.